Mini Cart
Free Shipping in the Continental US and Parts of Canada. 

EuroLux Home
Exploring Antique Furniture and Home Decorating Ideas
1920s Bungalow Renovation Antique Clocks Antique Furniture Restoration Antique Furniture Styles Antique Reproduction Furniture Antiques Buying Trip Client Spotlight Food & Entertaining

How to Fix Scratches on Antique Furniture

As part of our series on antique furniture restoration tips and tricks, I made this YouTube Video about how to easily fix wood blemishes, watermarks and scratches on antique furniture using furniture crayons. It is a question we hear quite often from friends and other people who have antique furniture. Perhaps they've accidentally scratched the wood moving the piece from room to room, or perhaps they have inherited a beloved heirloom that needs a little TLC.
In any case, we all know that we get a few wrinkles as we age! So here’s how you can do a little touch up and hide that blemish. This also works for new wood furniture that might have some superficial dings.
A Video on How to Fix Scratches
This is the video I made on YouTube about how to use furniture crayons to disguise scratches or other marks in the wood. I’ll also give a summary below.
There are various furniture crayons available, but Greg and I like to use Blendal sticks. Then we use Mohawk Tone Finish to set the crayons.
In the video example, I show how to use the furniture crayons to help with two different blemishes on an antique buffet or server. One is a gouge and scrape to the finish and the other one is a wear spot.
Using Crayons to Fix Scratches
Here’s the secret: When you use your furniture crayons, you must apply several different colors, rather than try to exactly match one color of wood. This is because aged wood isn’t one color, it has earned a patina of time that is subtly beautiful. And even new furniture crafted in antique style is often distressed so the wood looks aged.
So for this antique buffet in the video, I use a dark brown furniture crayon, a red one, an even darker brown one, and a black. The black is probably the most important one!
As I work the crayons into the wood, I’m going with the grain of the wood and I keep changing colors, adding a little of one color then a little of another. I rub it in with my fingers. It’s all about being patient and keep applying color until you feel like you have really camouflaged it in.
Keeping Your Wood Grain Healthy
As I said, black is important and I use it to give little grain lines, feathering it with my hand and putting a little more pressure on to smudge it in. Don’t be afraid to mix the colors because that’s what gives you the visual depth. Antique pieces do have different layers and shades on the patina of the wood from natural aging. They are not uniform in tone, and that’s part of what makes a piece of antique furniture look so wonderful.
Be sure to always use your fingers to rub along the same grain as the wood. I keep adding layers of color until I feel like I’ve made the match. You’ll see that in the video I’m really taking my time and using a lot of colors until I feel like it’s going to blend in with what’s there. Still, I fix both marks in less then 10 minutes, so it's pretty easy! If you are working on an area that has a lot of carving, you might need to use a toothbrush to get into the all nooks and details of the carving.
Tone Finish
Then I stand back and look at the whole piece. I know I'm finished when the area I worked on doesn’t jump out at me! Finally I use Mohawk Tone Finish to set the furniture crayons. We like to use the satin variety rather than a shiny one, because we find it blends in better.
I shake it to mix up the product and then do a test spray to make my nozzle is spraying evenly. Then I spray a really light mist. I let it set for just a minute and then give it another very light mist again. Sometimes you have to do two passes, especially when it’s a bigger chip or ding. But after the tone finish, you can’t really see that there was a problem there at all. When this dries, the work I’ve done really will have blended in. The blemish doesn’t jump out any more!
DIY Ways to Fix Scratches
Fixing deep scratches in wooden furniture can seem like a daunting task. Whether it's a lighter piece of furniture or something made from dark wood, these tips will be able to help you repair scratches. A quick DIY refinish of your scratched area, whether it's with a cotton swab, dry cloth, or simple furniture polish can be all you need to fix those pesky furniture scratches. We've even seen folks use a paper towel on the affected area to repair those wood scratches and scuffs.
If you have any questions about how to fix blemishes, watermarks and scratches on antique furniture using furniture crayons, please do leave a comment in the comment box below!

Aimee owns EuroLuxHome.com with her husband and best friend, Greg. With over 20 years' experience in acquiring and selling French Antique Furniture, she is very knowledgeable about furniture styles and how they are influenced by historical events. Aimee has shipped antique furniture and antique furniture reproductions to all 50 States and over 50 foreign countries. Subscribe to this blog for articles about antique furniture construction methods, style trends and even repair tips. Check out our YouTube channel!
Recommended Posts
-
Why We Love Renaissance Style Furniture
The Renaissance era had such a deep impact that even hundreds of years later, craftsmen were still trying to emulate its accomplishments. This furniture style became popular again in 19th century France. The antique Renaissance style furniture that we sell today is from this Revival period, dating to the late 19th and early 20th-century. This is the same era as...
Read On -
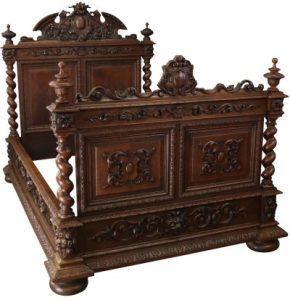
Antique Beds: 4 Things to Know
More time is spent in the bedroom than any room in the home. The mood of the room sets the tone of your day when you wake up, and lets you unwind as you go to sleep. With that in mind, it's important to go all-out on this space's decor! Purchasing an antique bed is an investment to say the...
Read On -
Clocks for the Home
Without superb wall decor in all of the primary living rooms and bedrooms, a house isn't a house. A high-quality timepiece on your nightstand or a desktop clock in your home office can elevate your interior design. It's just not the same telling the time on your phone! New, vintage, and antique clocks in traditional styles provide character and a...
Read On